In today's security-conscious world, taking control of your safety is essential. Self-installation of a high-quality whale tail lock enhances your security while keeping your budget intact. This guide will lead you through the self-installation of a whale tail lock helping you protect your belongings without going over budget.

Why Choose Self-Installation?
Before we delve into the installation process, let's explore why self-installation is a cost-effective choice. By opting for self-installation, you can save on labor costs associated with hiring a locksmith. Moreover, it allows you to gain a deeper understanding of your lock system. It enhances your ability to troubleshoot issues in the future.
Gather the Essentials
Before you embark on your DIY whale tail lock installation journey, it's crucial to gather the necessary tools and materials. You'll need:
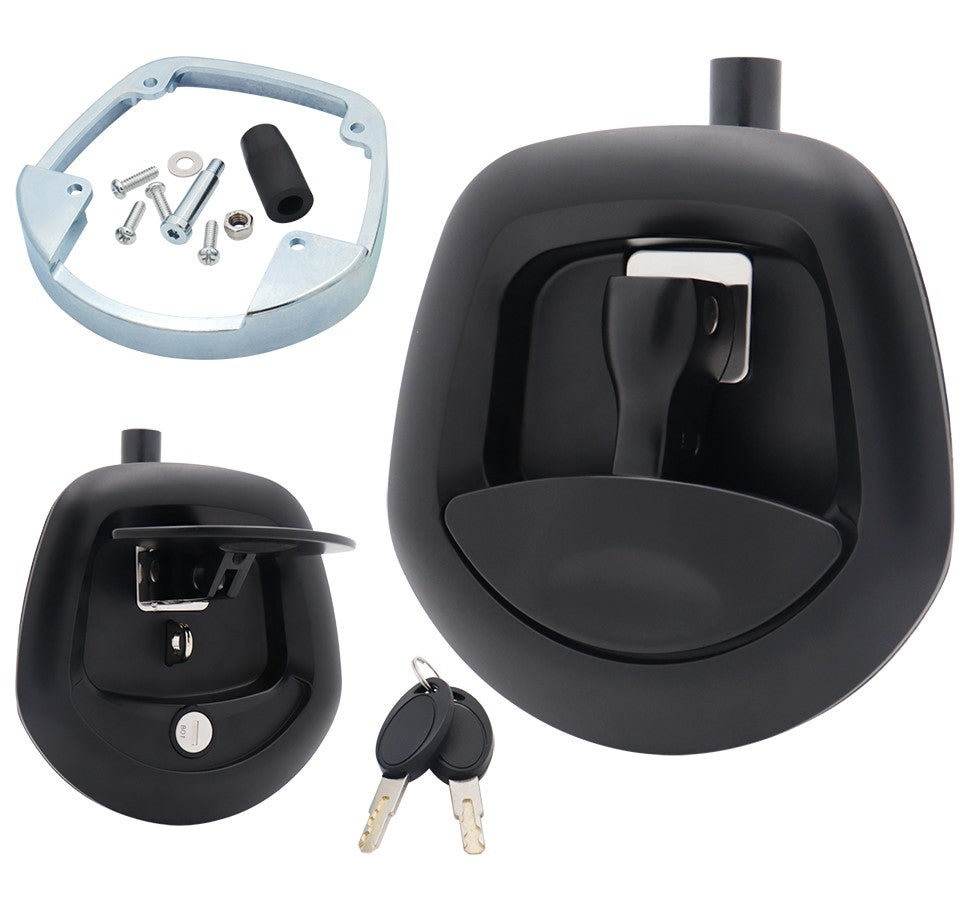
- Whale tail lock kit 🔐 - Ensure you have the appropriate lock kit for your door type.
- Screwdriver set 🔩 - Phillips and flathead screwdrivers will be essential.
- Measuring tape 📏 - Precise measurements are crucial for a snug fit.
- Pencil or marker ✏️ - For marking holes and measurements.
- Power drill
 - To create holes for screws and the lock.
 - Safety goggles and protective gloves 🥽🧤 - To ensure your safety during the installation process.
Having these tools at your disposal ensures a smooth installation process.
Step-by-Step Installation
Choose the Right Location
Selecting the ideal location for your whale tail lock is vital. Consider the height at which you want to install it, ensuring it's both convenient and secure. Mark the spot with a pencil or marker.
Measure and Align
Using your measuring tape, carefully measure the height and alignment of the lock. Precision is key to ensure the lock functions correctly. Double-check your measurements before proceeding.
Drill Pilot Holes
Put on your safety goggles and protective gloves. Using a power drill, create pilot holes where you marked the spot. These holes will serve as guides for the lock's screws.
Install the Whale Tail Lock
Unbox your whale tail lock kit and follow the manual instructions for installation. Typically, this involves attaching the locking mechanism to the door or gate and securing it with screws.
Test the Lock
Once the lock is securely in place, test it to ensure the key locking mechanism operates correctly. Make sure the lock engages smoothly and that there are no obstructions preventing it from working.
Final Adjustments
If needed, make final adjustments to the lock's alignment or tightness. It's essential that the lock operates seamlessly.
Secure Your Property
With your whale tail lock successfully installed, your property is now more secure than ever. Enjoy the peace of mind that comes with knowing you've taken steps to protect your home or belongings.
Cost-saving whale tail lock self-installation is a rewarding DIY project that enhances your property's security while saving you money. By following this DIY installation guide, you can enjoy peace of mind and significant cost savings. Remember that a well-installed whale tail lock is a robust defense against unauthorized access that provides you valuable protection for years to come.
Now that you've mastered the art of self-installation, why not take your security to the next level? Change your common lock handles and switch to whale tail locks. Check out our recommended whale tail lock to kickstart your self-installation project today.
Don't let budget concerns compromise your safety. Take the DIY route and secure your property with confidence!