
Maintaining the efficiency of your whipper snipper involves more than just regular use – it requires attention to detail, particularly when it comes to the cutting line. Over time, the line can wear down, become frayed, or break, necessitating a timely replacement. Mastering the skill of replacing the whipper snipper line not only ensures uninterrupted gardening work but also enhances the precision and effectiveness of your tool.
In this guide, we will take you through a step-by-step process, making line replacement a straightforward and hassle-free task. Understanding how to properly replace the line in your whipper snipper is an invaluable skill that will keep your garden edges crisp and your surfaces impeccably trimmed.
Gather the Necessary Tools
Before diving into the process of line replacement, it’s important to have the right tools and materials on hand. Here’s what you’ll need:
1. Essential Tools and Materials
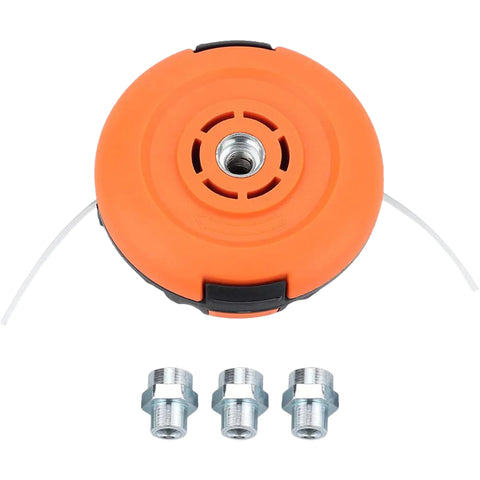
- Replacement Nylon Line: Choose a line that is compatible with your whipper snipper model. The thickness and length of the line can vary, so refer to your user manual for the recommended specifications.
- Safety Glasses: Protect your eyes from any debris or accidental snaps of the line.
- Work Gloves: These will provide a better grip and protect your hands during the process.
- Screwdriver: This may be required to access the cutting head, depending on your whipper snipper model.
2. Preparing Your Workspace
- Clean, Flat Surface: Choose a well-lit, clean, and flat surface to work on. This will make the process easier and help prevent any parts from getting lost.
- Organizing Your Tools: Lay out your tools and replacement line so that everything is within easy reach. This organization can streamline the replacement process.
Prepare the Whipper Snipper
Proper preparation of your whipper snipper is crucial for a smooth line replacement process.
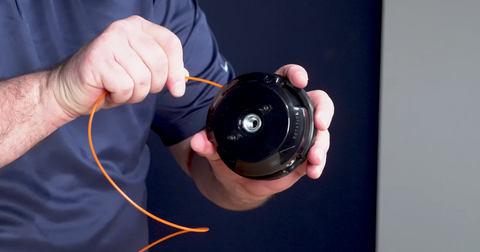
1. Removing the Existing Line
- Unwind or Cut: If there's an existing line in the cutting head, carefully unwind or cut it to remove it completely.
- Cleaning the Head: Once the old line is removed, clean any debris or grass from the cutting head to ensure smooth operation of the new line.
2. Accessing the Cutting Head
- Protective Shield Removal: Some models may have a protective shield over the cutting head. Use a screwdriver to remove it if necessary, keeping track of any screws or parts.
Thread the Replacement Line
Threading the replacement line correctly is key to effective trimming.
1. Cutting and Inserting the Line
- Measuring the Line: Cut a length of replacement nylon line, adhering to the recommended length for your model.
- Initial Insertion: Locate the line-loading ports or notches on the cutting head. Insert one end of the nylon line, following any directional arrows for proper winding.
2. Winding the Line
- Directional Winding: Carefully wind the line around the cutting head, following the direction indicated by the arrows. Ensure the winding is even and without overlaps.
- Leaving a Tail: Leave a small tail (about 5-10 centimeters) sticking out. This tail is crucial for the line to feed correctly during use.
Secure the Line
Ensuring the line is securely wound is essential for the whipper snipper's functionality.
Final Checks
- Tension and Security: After winding, check that the line is taut and securely in place. There should be no loose or dangling sections.
- Cutting Excess Line: If there's excessive line, trim it to the desired length, ensuring it's not too short to function effectively.
Reassemble the Whipper Snipper
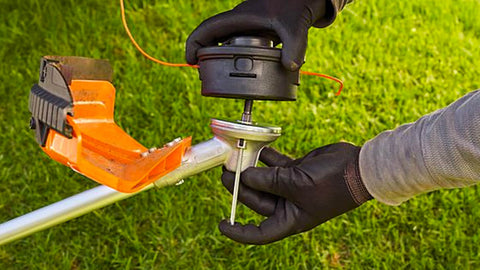
After replacing the line, reassemble any removed parts of the whipper snipper.
Putting Components Back
- Reattach the Shield: If you removed a protective shield, reattach it carefully, ensuring all screws are tightened securely.
- Alignment Checks: Make sure all parts are aligned correctly and securely fastened.
Test the Whipper Snipper
A final test ensures the line is installed correctly and the whipper snipper is ready for use.
Safety and Functionality Test
- Safety Precautions: Before testing, ensure all tools are cleared away, and wear safety glasses and gloves.
- Operational Check: Start the whipper snipper and observe the line's performance. It should feed and cut effectively without any issues.
Conclusion
Successfully replacing the line in your whipper snipper is a satisfying accomplishment that significantly enhances your gardening efficiency. With this guide, you've mastered a crucial aspect of whipper snipper maintenance, ensuring that your tool is always ready for action.
Regularly inspecting and replacing the line as needed will keep your whipper snipper in peak condition, delivering clean, precise cuts every time.
Embrace this routine maintenance task as part of your gardening journey, and enjoy the smooth operation and impeccable results it brings to your lawn and garden.
Dive deeper into garden tool mastery by exploring our extensive guide on whipper snipper care and maintenance. While perfecting your line replacement skills, why not explore our collection of premium whipper snippers designed for efficiency and durability? Happy trimming!